Ignite Romance: Crafting Your Perfect Backyard Gathering Spot
Imagine cozy evenings under a blanket of stars, the warm glow of a crackling fire, and the comforting presence of your partner beside you. Doesn’t that sound like the ideal setting for deep conversations and shared tranquility? While ready-made fire pits are an option, there’s something incredibly rewarding about creating a space with your own hands. Building your own outdoor fire pit isn’t just about constructing a structure; it’s a wonderfully collaborative DIY project that culminates in a custom cozy haven for countless memorable nights. Get ready to turn your backyard into a romantic escape and enjoy the satisfaction of building something beautiful and functional together.
Why a DIY Fire Pit Sparks More Than Just Flames
Embarking on a DIY fire pit project together offers significant benefits for your relationship, far beyond just having a place for s’mores. As noted by home improvement experts like those at This Old House – a trusted authority in DIY and home renovation – such projects foster essential teamwork, problem-solving skills, and a tremendous sense of shared accomplishment. When you tackle a construction project, you’ll naturally engage in planning, delegating tasks, and overcoming small challenges, all of which strengthen communication. The physical act of building something tangible from the ground up also provides a unique bonding experience. It’s an investment of your time and effort that results in a beautiful, functional addition to your home and a lasting symbol of your ability to create together.
Building Your Outdoor Fire Pit: A Step-by-Step DIY Guide:

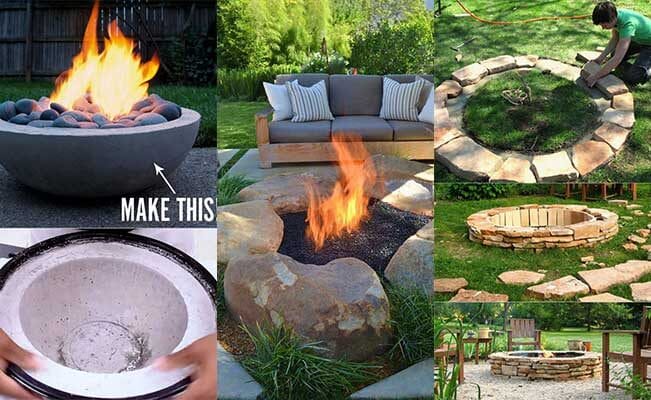
Ready to dig in and construct your cozy outdoor retreat? This DIY project for an outdoor fire pit is achievable for most couples with basic tools and a bit of determination. Remember, safety first! Always check local building codes and fire regulations before starting.
Step 1: Choose Your Location & Prepare the Site
- Location: Select a level spot at least 10-20 feet away from any structures, trees, or flammable materials. Consider wind direction.
- Excavate: Dig a circular hole about 6-12 inches deep and roughly 40-50 inches in diameter (adjust to your desired fire pit size). For precision digging, tools can be found at hardware stores like The Home Depot.
- Base Layer: Fill the hole with 4-6 inches of gravel or crushed rock for drainage and stability. Tamp it down firmly.
Step 2: Lay the First Course of Retaining Wall Blocks
- Materials: Purchase concrete retaining wall blocks or fire-rated landscape bricks from your local home improvement store. You’ll need enough for 2-3 layers. Ensure they are designed to withstand heat.
- Placement: Lay the first circular course of blocks directly on your gravel base, making sure they are level. Leave small gaps for drainage if the blocks don’t naturally allow it.
Step 3: Add Subsequent Layers
- Stacking: Stack the second layer of blocks on top of the first, staggering the joints like bricks for stability. For a more robust structure, you can use high-heat refractory mortar or construction adhesive (specifically designed for outdoor masonry) between layers.
- Height: Two to three layers of blocks are usually sufficient for a safe and functional fire pit, providing a good rim height.
Step 4: Install the Steel Fire Ring (Crucial for Safety & Durability)
- Protection: Place a pre-fabricated steel fire ring insert inside your block structure. This is critical as it protects the blocks from direct heat, preventing cracking and extending the life of your fire pit. Make sure the ring fits snugly within your block circle. You can find these at most hardware stores or online retailers like Amazon.
- Final Layer: If your fire pit will have a third layer of blocks, place it now, ensuring it overlaps the top edge of the steel ring slightly, creating a finished look.
Step 5: Fill with Lava Rocks or Fire Glass (Optional, for Aesthetics and Heat)
- Base: While not strictly necessary for function, adding lava rocks or fire glass to the bottom of the fire pit can enhance its appearance and even out the heat distribution.
Step 6: Curing & First Fire (Patience is Key!)
- Cure Time: If you used mortar or adhesive, allow the fire pit to cure according to the product’s instructions (usually 24-72 hours) before its first use.
- First Burn: Start with a small fire to gradually acclimate the materials to heat.
This detailed guide for your outdoor fire pit DIY project ensures you’re set up for success and safety.
Warmth and Memories: The Lasting Legacy of Your DIY Fire Pit
Completing your outdoor fire pit isn’t just about finishing a DIY project; it’s about creating a new centerpiece for your shared life. This isn’t just a place to burn wood; it’s a stage for storytelling, intimate conversations, and countless s’mores nights that will become cherished traditions. The satisfaction of sitting by a fire you built together is immeasurable, providing a tangible reminder of your collaborative spirit and shared accomplishment. This cozy addition to your backyard will serve as a constant invitation to slow down, connect, and build beautiful memories under the stars, solidifying the bonds you’ve forged through teamwork and creativity.